Hi All,
Today's card creations are made with a wonderful stampset & coordinating die "Hello Gorgeous".
For most of the cards I have used some left over project life cards as an added layer.
Card 1 - Ombre card base with Stampin Up Blushing Bride Ink.
Each of the images have been heat embossed with white embossing powder on crumb cake cardstock.
Card 2 - A tone on tone card by repeat stamping one of the small floral images on a crumb cake card base. I have added some glitter washi tape over the project life card. After I stamped the hello in crumb cake I have gone over it with clear wink of stella.
Card 3 - Heat embossed the "Hello" in gold embossing powder.
I have also repeats stamped one of the bigger images in the background with some light sponging.
Card 4 - This is card is my favourite. Same techniques as the previous cards but instead if the project life cards I have die cut a circle to stamp the "hello" sentiment in baked brown ink. I have gone over the hello with clear wink of stella. The crumb cake layer has been placed slightly off centre adding some interest to the card.
I have also entered Card 5 in the AAA Challenge .
Happy New Year all , Jo here and welcome to my first blog post for the year.
Today I have made a sweet card set using two of my favourite Inspired By Stamping stampsets. The first stampset is the "Easter Lily" & second one is the "Hello", which I have cutup. I know for some of you this may be rather daunting. The OCD side of me really struggled with this concept however I wanted to tailor my gift set as I had a specific friend in mind to give this to.
Ok,so I first cut up this stampset as you can see below. I set aside the sentiments that I wish to use on a separate cardstock.
The sentiments has been heat embossed with white embossing powder on coloured strips of coloured cardstock.
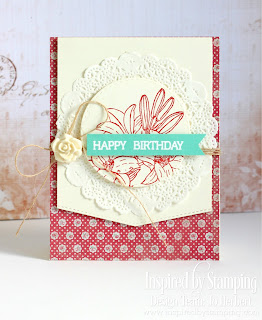
I tapped into my paper stash hoard vault and pulled this beautiful paper collection out. I have used the paper to cover the full top folding vanilla base for thecard front. With very vanilla cardstock panels I have die cut with border strip framelits to create interest tot he panels and foam mounted this onto the floral paper.
To add a feminine touch to accompany the type of paper chosen I have used paper doilies which I have placed on carefully with glue dots as I found this type of adhesive was less likely to be seen through the very paper thin doilies.
I have stamped the Lily image on die cut circles and hearts with light blue & strawberry inks. To embellish each card I have used two types of hemp twine natural and bleached. I have also used some resin flowers and buttons to tie off the twine which I have adhered on with glue dots.

I hope you enjoyed today's sweet card creation set and i am looking forward to creating more projects for you throughout the year.
Lots of paper crafting hugs.
Jo
Supplies -
Vanilla Cardstock
Paper Doilies
Hemp Twine
Border stitched die
Hearts die
Circle stitched die
Martha Stewart Score board
Fiskars cutter
Bone Folder
Glue Dots
Foam Tape
Versafine Ink
Light Blue Ink
Strawberry & dark pink Ink
Hi All, welcome to today’s blog post. Today I play with gold foil cardstock with the red poinsettias making a statement piece on both the card and co-ordinating tag. Making these types of sets are so much fun to make and look so good when giving it to a recipient.
See below instruction on how I made this set.
Card
Step 1. Dry emboss with your die cutting machine a white piece of cardstock that with an embossing folder, I have used a 3D embossing folder adding a geometric modern touch to the card.
Step 2. Die cut all the layers that will be needed for the card. I have die cut a scalloped stitched rectangle border cut in gold foil (cut 2 of these as you will need the second one for the tag) and a stitched circle cut out in white cardstock.
Step 3. Mount with the gold foil scalloped border on a gold striped foil designer series paper.
Step 4. The “Merry Christmas” sentiment from the Inspired By Stamping “Festive Greetings” stampset has been heat embossed on a white stitched circle cardstock.
Step 5. To add a pop of colour to the card I have used an Inspired By Stamping paper poinsettia.
Tag
Step 1. Die cut a white & a Gold Foil cardstock with any tags of your choosing. Place the gold tag behind the white slightly lower to create another layer to the tag. I used just the bottom portion of the gold foil tag and kept the top half for another project.
Step 2. Heat emboss with gold embossing powder the “Merry Christmas” sentiment on the tag.
Step 3. Place gold glitter washi tape as the first layer on the tag.
Step 4. Using the rectangle scallop border cut out an edge and add to tag as a scalloped trim border. This is another great way in using what you have and not necessarily being the whole die cut piece is needed.
Step 5. Add the poinsettia to the tag and you are done.
This is my last post for the year and I hope you all have a blessed Christmas and look forward to making new creations with Inspired By Stamping goodies as a design team member again. Please also visit my blog – joanneherbert.blogspot.com.au
Wish lots of love, hugs and prayers. Jo
Hi
paper crafting peeps, today’s Christmas cards were are going with clean and
simple designs. With one Christmas
greeting stampset and some Christmas designer series paper this simple set can
be made used on a mass production scale.
For
all the card bases I have used very vanilla cardstock which I have cut and
scored so the cards are landscape . To
add some extra elements to each card I have used a strips of coloured card stock
to co-ordinate with each designer series paper.
The Inspired By Stamping sentiment “Festive Greeting” has
been stamped with 3 x Versafine
inks 1. Crimson Red, 2. Toffee Coffee & 3. Vintage Sepia.
Each card I have used
a pine cone die and each pine cone has been topped with either hemp linen
thread or gold ribbon.
I hope today’s cards inspires you on how to mass produce
clean and simple yet beautiful cards.
Paper Craft Hugs
Jo xo


